Pages

Sunday, December 29, 2013

Crafting for the holidays

Ive been a sewing fiend for xmas this year!

I made spats/ faux leather boots for my kids. The octopus is for the steampunker, and the fleur di lis is for the pirate.
Steam kid also got some jodhpurs, since those are really handy for airship crew, pirate in training got a tri-corn. 

The hubs is still waiting for his goodies, a Star Wars shirt.


Wednesday, December 18, 2013

Processes

Im making some new fan art pieces.
Actually its a commission piece, but Im running with it and making a few fan-fic art pieces, because I am inspired!

Topic:Loki
Style: scrap book tag

One of the reasons this is a fun project is I am Loki'd, kind of. I mean yeah hes not the good guy, but hes got long black hair, and really, all the best lines. Have you seen the latest Thor yet? He really does have the best come backs and a high snark appeal.

So there are lots of good quotes to use, plus since he is a Norse god, I can use some celtic patterns in the mix.

The dimensional icon, his helm

Ok so I start with some sketches:


Next up make the pieces I need for molding. Te end result is going to be in metal clay. That has limited work time, so I like to be well prepared.

WhenI first got into metal clay I gutted a cheap thrift store typewriter (metal alphabet stamps were not readily available, like they are now). For the quotes, and I am making a selection of them (like I said he had some great lines). I stamped out the quotes in polymer clay and cured it. I them make reverse stamps using polymer clay of the phrases/ words. This way the word is all good the stamp at once, and I dont have to worry about the metal clay drying out while Im looking for a "T."


The helm was a bit of a challenge. At first I thought I would go with a layered piece, basically flat art, but with the appearance of having dimension. I *thought* I would use the polymer clay technique called tear away, where you burnish a photocopy onto the clay and the clay sticks to the toner and lifts away with the paper. Well since clay formulas have been changing since they removed the phalates, this doesnt readily work any more. I even researched it and found some reports of specific color mixes, and specific papers, and....well none of it worked for me.

I dont have and cant currently afford either a photopolymer plate system or a cameo die cutting system. That pretty much means I needed to bite the bullet and sculpt it.


My next steps are making the molds from the polymer clay mock ups of the helmet and of the celtic knot dog tag I made (not pictured), then its time to break out the metal clay and get working!

Ive already started this process for some Doctor Who pieces as well. I have a few mini Tardis ready for mold making, some great text in circular Galifreyan  ready to make scratch foam texture plates, and a collection of quotes: Allonzy, Hello Sweetie, Im a mad man with a box. Of course I am partial to "I wanted to see the universe so I stole a doctor and ran away" 
And there is a whole line can be done with the bad guys, the daleks, the cyber,en, and the angels. They are my fave, as I have already started making some of those.


Need to look up more classic sayings, and figure out if I need an additional icon, and of course what would that icon be? Its not like there arent 50 years of the show to fallback on.


Monday, December 16, 2013

Posting lots of new things to the Etsy store!

Take a look at some of the great things Ive been posting to the Etsy site!
Http://www.zoeowyn.etsy.com


Friday, December 13, 2013

My clay is too soft


Last week I explored options for what to do with stale dried up clay. This week I am looking at how to deal with the opposite problem: the clay is just too squishy.
Seems silly right? After all as polymer clay artists we want good pliable clay. Well we also want clay to hold its shape, and to not pick up every single thumb print even when your fingers aren't near the clay.

When clay is too soft and squishy its because it has too much plasticizer in it. To make a better quality of workable clay the plasticizer needs to be removed.

I only know of two ways this can be done. The first way is to leach the plasticizer out.
This is done my layering flattened out clay on to clean paper. The longer the clay is left the more plasticizer is pulled out from the clay.

In these photos, all those little oil spots on the paper is the plasticizer being pulled out of the clay.


The other method I have, is the same as one of the methods for dealing with hard clay. Layer the soft clay with stale dried up clay. The dried up clay absorbs the plasticizer, and when blended the two clays even each other out for a nice workable clay.


This tray has several colors of old dried up clay layered with softer clay of similar color. The clays will be blended after a few days (maybe a week or so) for a unified color and workable clay.

Thursday, December 5, 2013

My clay is too hard

Well it happens, polymer clay gets old and goes stale.
When this happens it TAKES FOREVER to condition it, and frankly there are time when it just cannot be done with out some outside assistance.

I have a few different ways of dealing with clay when this happens.

Beat it into submission


handy dandy food processor

Standard conditioning isn't working, your hands are getting tired, and running the clay through the pasta machine just crumbles it up more. My first line of defense is the food processor. This little guy works magic, and is also "the bomb" when processing large quantities of clay.


Clay Softener


One way that a lot of folks will tell you condition your hard, dried out crumbly clay is to use clay softener. Ok, it works. But be warned: it melts the clay into a softer state, and it canpush it over the edge quickly.

The scene: the clay crumbles, wont stick to its self, forget running it through the pasta machine to smoosh it together, its a mess. You add a drop of softener, nothing happens. You add another 2 drops, and things are starting to show signs of improvement, but still not quite right. You think instead of working this mess more with your hands (getting those little clay particles a bit warm really helps them to become pliable) you decide to add another drop or 3 of softener, then whammy you have a slimy mess on your hands, and now have to figure out what to do with over conditioned clay thats too smooshy to do anything.

I have read you can use mineral oil, or baby oil. I haven't tried that yet, so I can't really tell you if its going to work.


Scrap clay/base colors

base colors blended from a variety of old polymer clays

I use a lot of "base clay," clay of whatever color as an under layer for projects. I find that this is the perfect job for old dried out clay. I take the clay, cut it into smallish chuncks and run them through my mini food processor (that I have had for 20+ years, still works great, and is completely dedicated to clay). I mix the colors all up. The funky little balls of clay will get every where, but I try to keep track of them. I run this mess through the pasta machine a bazillion times and usually end up with a fairly well mixed color.

mini balls of clay out of the food processor

Blend, slice, run it through the pasta roller


To catch the bits that fall off when I run it through the pasta machine, I place a piece of well conditioned clay, all rolled out, underneath to "catch" the pesky scraps that fall off.

Crumb catcher layer of conditioned
clay lining the bottom of the pasta roller.


Color control

Prepping stale clay to be conditioned with new clay, while maintaining the color.


Ok when color has to be maintained. I take the old hard stuff and layer it with fresh clay or the same/ similar color. I find this works best if I can layer the old clay with one of the super squishy clays like Fimo Soft or Sculpey III. Let the clays co mingle for a day or too. This lets whatever is in the polymers to sort of transfer back and forth. Then I hand condition it, use the handy little food processor if it needs some help, and of course roll the heck out it with the pasta machine.

I know some colors are no longer produced, in those cases I just go with the best match I can find.


The chemistry/whats going on here?
Im not going to get into al the fancy-dancey names of the compounds that are moving back and forth, because frankly I don't know them and don't care. What ever the plasticizers are in polymer clay that allow it be smooshable they need to be replaced in the old stale/dried out clay. Clay conditioner adds this plasticizer back in. This plasticizer can also come from other clays that still have it. In some clays there is too much of it, and thats why they are super easy to work with with minimal conditioning.

Check back next week for part two "My clay is too soft"

Friday, November 29, 2013

Holiday Season Shopping


The sales have begun!

coupon code:
holidaze

15% off all orders in my Etsy shop
http://www.zoeowyn.etsy.com


Thursday, November 21, 2013

Perler Beads-Im addicted!


I used to hate these little things. The art was never very interesting, and the boards always got bumped on the way to the iron.
Then one random day I saw a student wearing a hair bow made from this things and my brain started zooming around like crazy!
8-bit art, its just 8-bit art!

I decided I needed to see what could be done with 8-bit art.

A bigger peg board really can help make a difference at looking at this as "kids crafts" into a craftable art form

I went a bit crazy on Pintrest, started pinning a few ideas, next thing you know I have an entire perler board:
 http://www.pinterest.com/zoeowyn/pearler-beads/


(Yes perler is mis-spelled, but if I correct it all those who already link to it will have broken links, tried it, so its gonna be misspelled, sorry about that.)

I also have a lot of cross stitch on there  because its sort of the same thing.

Ive even gotten my kids into it, and they will be making goodies as x-mas gifts this year.

I ended up purchasing a bucket of 6,000 beads, heres kiddo sorting them into color families

I used this as the activity at my kid's sleep over and its pretty much the only 2 hours they were relatively behaved as a group--the kids loved it, and even got up in the morning and made more!


Tuesday, November 19, 2013

desperate plea....


do a girl a favor huh?
go buy something!
https://www.etsy.com/shop/zoeowyn

newly listed on Etsy:
fairy doors
dragon eggs
juju charms
this gorgeous ammonite and cuddle fish design

And lets not forget, I am continuing the pre-listing sale on my facebook page
www.facebook.com/pages/Laura-Medeiros-Art-stuff/147377941945717


Thursday, November 14, 2013

Balloons!


This is the most amazing balloon animal I have ever seen!
That is all.

Thursday, November 7, 2013

Business Books

Crafting isn't all about making stuff. Of course thats the fun part!
However, there is the business side of things. And a successful craft business is my goal!

Since I did not major in business in school, and frankly my personal selling skills leave much to be desired, I do try to learn as much as I can.

I do this by reading books.

This week I had the opportunity to preview Finding Your Inner Etsy-preneur.


http://www.amazon.com/Finding-Your-Inner-Etsy-preneur-Encouragement-ebook/dp/B00GBQ4IWI/ref=sr_1_1?ie=UTF8&qid=1383784335&sr=8-1&keywords=finding+your+inner+etsy-preneur

Its interesting. Through a series of personality test, it helps you to determine how you can best approach mastering your sales for your Etsy shop. I know right now there are a lot of discussions going on out there regarding Etsy and the nature of handmade, thats not the issue here or discussed in this book. This book is all about how to leverage your personality type and tendencies to maximize your Etsy experience.

I had fun with the personality type testing, and I think it was pretty spot on for me. I do  plan on actively applying some techniques from this.

The other book I finally finished this week was (ok forced to finish it as I had to return it to the library) completely unmemorable. Seriously, it was one of those cool looking books, with lots of nice crafty-art pictures. At first glance it had lots of useful forms, but unfortunately it was pretty much a repeat of many other books out there. How to pick an art fair (man the books make this sound so easy--its not), how to set up teaching, how to make yourself presentable with business cards and logos. The book was from a few years ago, so I know its not on the shelves any longer, and I couldn't even find it on Amazon to provide you with a link.

The one thing that stood out the most in the book for me was the section on how to shoot quality images of your art. The examples, booth good and bad, were printed in such a way that what ever quality they were trying to show off didn't show up. For example, two photos discussing how the shadows in the back ground were distracting and how to fix that, when BOTH images printed with solid black backgrounds.

All in all it was a pretty but useless book, so I guess its ok I forgot the title.

Wednesday, November 6, 2013

Sale on my Facebook page


Are you a "fan" of mine on Facebook?

If not please come follow me over there too! You can click the QR code to the right and it will take you to my page, or this link will too:

https://www.facebook.com/pages/Laura-Medeiros-Art-stuff/147377941945717?ref=hl

Until November 15, Im having a pre-Etsy sale. Im posting items on my Facebook page at a discount before I list them on Etsy. I would love it if you came and took a look!


Im listing all kinds of items from jewelry to decorations: pendants, hair accessories, fairy doors, and dragon eggs have been listed so far.


Monday, October 28, 2013

Halloween Jewelry Blog Hop!


This year I thought it would be fun to play in a Halloween Blog Hop.
Thanks to Diana Ptaszynski for putting this together (she is the first in the list of blog hoppers).

Our rules:

  • Participants will create at least one piece of jewelry in a Halloween or Day of the Dead theme.  
  • Each piece of jewelry must contain at least one art bead (visit Art Bead Scene if you need clarification on art beads).

Since I make most of my components anyway I thought this would be fun. Its always halloween around our house, skulls and the like are "normal" for us, so i thought I would challenge myself and push it a bit. Then the next thing I know time has gotten away from me and instead of making a groovy haunted mansion like my chicken shack, Im doing something quick and fast and easy.

Oh well. I m still going to make that haunted mansion, just its not my entry for this. My pieces are all polymer clay (ran out of time) candy corn earrings, a mini pumpkin pendant and a witch's hat, that still needs to be glued to its hair clip. They will all be presented to my halloween baby this year for prezzies (yup, born on Oct 31, and she LOVES it).


Your hoppers:


Kathleen Breeding  http://99bobotw.blogspot.com


Dianne Miller  http://www.artbydianne.blogspot.com

Lisa Liddy  http://www.lisaliddy.wordpress.com

Toltec Jewels  http://www.JewelSchoolFriends.com


Laura Medeiros  http://Www.zoeowyn.blogspot.com

Veralynne Malone  http://www.veradesigns.blogspot.com


Jenny Davies-Reazor  http://jdaviesreazor.com/blog


Stephanie LaRosa  http://Www.stringaholic.blogspot.com


Nicole Valentine Rimmer  http://www.nvalentine.blogspot.com


Sarajo Wentling  http://www.sjdesignsjewelry.blogspot.com


Dawn M. Gallop  http://www.flipflopsandpoptarts.com

Thursday, October 24, 2013

What's on the bench?


I really haven't taken the time to clean off my work space and dive back into metal clay like I had hoped. But thats ok.
I started playing with these talisman/amulet "Juju" collection pieces.

These pieces are fun because I can play with my collection I mean stash of supplies, I can toss in some wire work, and include charms I make.

By the time I got to the last one of this bunch, I think I had the swirls on the large frame figured out.

These will make their debute at the Alabama Renaissance Festival this weekend October 26-27, and then they will make their way over to my Etsy store, with a few other I have assembled (well actually these will sell this weekend and I will have new and different ones in my Etsy store!--the power of positive thinking!)

This talisman collection features a carved jade fluke, an amethyst point, a ceramic sphere, a bronze tentacle, and a faceted amber bead.


This collection has a large fluorite bead, a buffalo tooth, a metal hand holding a ring, and a carved coral skull.

This was my first collection. it features a large hamsa and has raw amber beads, a raw garnet, a green glass bead and a silver drop with a wood bead from central Asia.

Thursday, October 17, 2013

The Ball Burnisher, Love this tool


I have a small collection of ball burnishers. The original one is from my art school days, when I used the tool to rub down custom colored text elements for design comps (yes that tool is over 20 years old, and I still use it!). It was during school that I discovered it was a great tool for clay (my first polymer clay playing was back in 1988/89). I now use the ball burnisher for polymer and metal clays.


Ball burnishers are great for making texture, drawing, smoothing seams, punching holes, and of course, making dots. Lots and lots of dots-for me that means suckers on tentacles.


Back when Sculpy expanded with the Studio brand clay, they also expanded the tool offerings. Even though Studio has disappeared from craft store shelves, the tools have not. That is a good thing, because the tools are fabulous. One of the sets is a small, piece, collection of ball burnishers one one end with clay pushers on the other. the different sizes of ball burnishers are very useful -- I particularly like the large ball for smoothing seams, and as a dome forming base.


My tiniest ball burnishers are nail tech tools--I got mine at a beauty supply store.

Drawing with a small ball burnisher
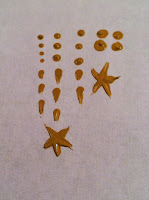
Not only are these tools great with clay. you can paint with them! They make perfect dots, and with some practice (clearly I need some more) and a flick of your wrist, you can make stars, swirls, flowers and fireworks.
I clearly need practice, painting with a ball burnisher.
If you don't have any ball burnishers, I can't recommend getting one enough. In the mean time you can use a dried up ball point pen (you don't want ink transfer), or knitting needles of various sizes. Aluminum knitting needles are incredibly handy tools to have as well, they make dots, they smooth, and you can use them as big hole forms.