Pages

Showing posts with label polymer clay. Show all posts

Thursday, August 7, 2014

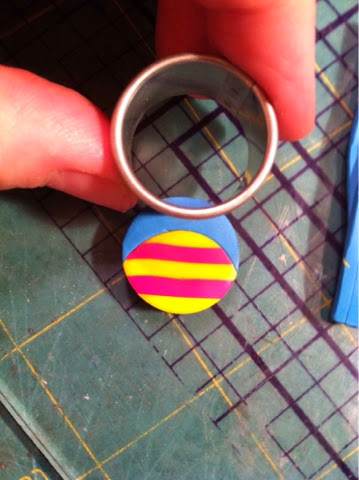
Simple little owl tutorial


This makes a cute little easy owl.

You need:
Clay: 3 colors for the body, white and black or blue for eyes , orange for beak
A roller or pasta machine
Tissue blade
Small cookie cutter: round or oval
Metal head pin to insert to hang


Thursday, February 27, 2014

Ooh book marks.


New book marks

About a week ago a polymer clay page on facebook (the Polymer Arts) posted this image of a devise for helping you hold open your book one handed.

Along with the image was the comment of how this would be a good thing to try in polymer, so I did.


I found out these are being made in plastic, and wood, and all kinds of ways. So instead of trying out as just another thing to be lost, I decided to make it into a book mark.


So far feed back has been positive, and I will have a new product for bibliophiles in my etsy shop tomorrow!


Friday, December 13, 2013

My clay is too soft


Last week I explored options for what to do with stale dried up clay. This week I am looking at how to deal with the opposite problem: the clay is just too squishy.
Seems silly right? After all as polymer clay artists we want good pliable clay. Well we also want clay to hold its shape, and to not pick up every single thumb print even when your fingers aren't near the clay.

When clay is too soft and squishy its because it has too much plasticizer in it. To make a better quality of workable clay the plasticizer needs to be removed.

I only know of two ways this can be done. The first way is to leach the plasticizer out.
This is done my layering flattened out clay on to clean paper. The longer the clay is left the more plasticizer is pulled out from the clay.

In these photos, all those little oil spots on the paper is the plasticizer being pulled out of the clay.


The other method I have, is the same as one of the methods for dealing with hard clay. Layer the soft clay with stale dried up clay. The dried up clay absorbs the plasticizer, and when blended the two clays even each other out for a nice workable clay.


This tray has several colors of old dried up clay layered with softer clay of similar color. The clays will be blended after a few days (maybe a week or so) for a unified color and workable clay.

Thursday, December 5, 2013

My clay is too hard

Well it happens, polymer clay gets old and goes stale.
When this happens it TAKES FOREVER to condition it, and frankly there are time when it just cannot be done with out some outside assistance.

I have a few different ways of dealing with clay when this happens.

Beat it into submission


handy dandy food processor

Standard conditioning isn't working, your hands are getting tired, and running the clay through the pasta machine just crumbles it up more. My first line of defense is the food processor. This little guy works magic, and is also "the bomb" when processing large quantities of clay.


Clay Softener


One way that a lot of folks will tell you condition your hard, dried out crumbly clay is to use clay softener. Ok, it works. But be warned: it melts the clay into a softer state, and it canpush it over the edge quickly.

The scene: the clay crumbles, wont stick to its self, forget running it through the pasta machine to smoosh it together, its a mess. You add a drop of softener, nothing happens. You add another 2 drops, and things are starting to show signs of improvement, but still not quite right. You think instead of working this mess more with your hands (getting those little clay particles a bit warm really helps them to become pliable) you decide to add another drop or 3 of softener, then whammy you have a slimy mess on your hands, and now have to figure out what to do with over conditioned clay thats too smooshy to do anything.

I have read you can use mineral oil, or baby oil. I haven't tried that yet, so I can't really tell you if its going to work.


Scrap clay/base colors

base colors blended from a variety of old polymer clays

I use a lot of "base clay," clay of whatever color as an under layer for projects. I find that this is the perfect job for old dried out clay. I take the clay, cut it into smallish chuncks and run them through my mini food processor (that I have had for 20+ years, still works great, and is completely dedicated to clay). I mix the colors all up. The funky little balls of clay will get every where, but I try to keep track of them. I run this mess through the pasta machine a bazillion times and usually end up with a fairly well mixed color.

mini balls of clay out of the food processor

Blend, slice, run it through the pasta roller


To catch the bits that fall off when I run it through the pasta machine, I place a piece of well conditioned clay, all rolled out, underneath to "catch" the pesky scraps that fall off.

Crumb catcher layer of conditioned
clay lining the bottom of the pasta roller.


Color control

Prepping stale clay to be conditioned with new clay, while maintaining the color.


Ok when color has to be maintained. I take the old hard stuff and layer it with fresh clay or the same/ similar color. I find this works best if I can layer the old clay with one of the super squishy clays like Fimo Soft or Sculpey III. Let the clays co mingle for a day or too. This lets whatever is in the polymers to sort of transfer back and forth. Then I hand condition it, use the handy little food processor if it needs some help, and of course roll the heck out it with the pasta machine.

I know some colors are no longer produced, in those cases I just go with the best match I can find.


The chemistry/whats going on here?
Im not going to get into al the fancy-dancey names of the compounds that are moving back and forth, because frankly I don't know them and don't care. What ever the plasticizers are in polymer clay that allow it be smooshable they need to be replaced in the old stale/dried out clay. Clay conditioner adds this plasticizer back in. This plasticizer can also come from other clays that still have it. In some clays there is too much of it, and thats why they are super easy to work with with minimal conditioning.

Check back next week for part two "My clay is too soft"

Thursday, October 17, 2013

The Ball Burnisher, Love this tool


I have a small collection of ball burnishers. The original one is from my art school days, when I used the tool to rub down custom colored text elements for design comps (yes that tool is over 20 years old, and I still use it!). It was during school that I discovered it was a great tool for clay (my first polymer clay playing was back in 1988/89). I now use the ball burnisher for polymer and metal clays.


Ball burnishers are great for making texture, drawing, smoothing seams, punching holes, and of course, making dots. Lots and lots of dots-for me that means suckers on tentacles.


Back when Sculpy expanded with the Studio brand clay, they also expanded the tool offerings. Even though Studio has disappeared from craft store shelves, the tools have not. That is a good thing, because the tools are fabulous. One of the sets is a small, piece, collection of ball burnishers one one end with clay pushers on the other. the different sizes of ball burnishers are very useful -- I particularly like the large ball for smoothing seams, and as a dome forming base.


My tiniest ball burnishers are nail tech tools--I got mine at a beauty supply store.

Drawing with a small ball burnisher
Not only are these tools great with clay. you can paint with them! They make perfect dots, and with some practice (clearly I need some more) and a flick of your wrist, you can make stars, swirls, flowers and fireworks.
I clearly need practice, painting with a ball burnisher.
If you don't have any ball burnishers, I can't recommend getting one enough. In the mean time you can use a dried up ball point pen (you don't want ink transfer), or knitting needles of various sizes. Aluminum knitting needles are incredibly handy tools to have as well, they make dots, they smooth, and you can use them as big hole forms.


Friday, September 27, 2013

Tutorials That Works: Polymer Clay Eyeballs


I decided I needed a good eyeball for a figurine I was making. I wanted it to be a good, glass-like eyeball, really add some pop, especially since the figurine has buggy-out eyes.

I encountered a few variations of this tutorial on Pintrest for how to make glossy doll eyes.


THEY WORK!
These were the tutorials I referenced:
http://mistymooncreations.blogspot.com/2010/10/glass-eyes-for-your-dolls-tutorial.html
http://munchkinscreations.com/Eye1to3.html
http://makeitwithme-kell.blogspot.de/2011/09/how-to-make-fimo-clay-eyes-for-pin-up.html


I made a full eyeball, since they needed to bug out.
I used some texture making tools, a pin and ball burnisher to "draw" the details of the iris in place.

I covered and cured the the balls following manufacturer's instructions. One eye cracked. I remember a few years ago some artists were having this issue– white beads cracking, there was something wonky in the formula. My white clay was from that time, and it was that brand. (my clay is several years old, Im sure this issue has been corrected-cracking upon curing is not normal.) Since the crack was on the back side of the eye, and would be covered with eyelid, I wasn't too worried about it.

I used watered-down acrylic paint to color the irises.

waiting for the liquid clay

After they dried I used some foil to brace the balls from rolling around.

I heeded the warnings about messing up the liquid clay, so I worked in the kitchen right next to my pre-heated oven.
liquid clay in place

right out of the oven, very cloudy
Everything worked just as described. I found that I did have to move my heat gun a bit closer than 3 inches to get the liquid clay to clear up.
had to move the heat gun a bit closer than 3 inches


the irises got all glassy!

And here you can see the eyes in place.