Pages

Showing posts with label wire wrapping. Show all posts

Thursday, October 24, 2013

What's on the bench?


I really haven't taken the time to clean off my work space and dive back into metal clay like I had hoped. But thats ok.
I started playing with these talisman/amulet "Juju" collection pieces.

These pieces are fun because I can play with my collection I mean stash of supplies, I can toss in some wire work, and include charms I make.

By the time I got to the last one of this bunch, I think I had the swirls on the large frame figured out.

These will make their debute at the Alabama Renaissance Festival this weekend October 26-27, and then they will make their way over to my Etsy store, with a few other I have assembled (well actually these will sell this weekend and I will have new and different ones in my Etsy store!--the power of positive thinking!)

This talisman collection features a carved jade fluke, an amethyst point, a ceramic sphere, a bronze tentacle, and a faceted amber bead.


This collection has a large fluorite bead, a buffalo tooth, a metal hand holding a ring, and a carved coral skull.

This was my first collection. it features a large hamsa and has raw amber beads, a raw garnet, a green glass bead and a silver drop with a wood bead from central Asia.

Thursday, August 8, 2013

Painted glass gems and what to do with them


I have become obsessed recently with painting glass gems.
I posted about them back in March here: http://zoeowyn.blogspot.com/2013/03/glass-nail-polish-gems.html


Well what can you do with all of them?

All sorts of things


I have been playing with some wire wrapping. The first one I did is a classic swirling cab capture I learned from Dale "Cougar" Armstrong. I believe its in her book.
And if its not, its still a fantabulous book


Then there is this tutorial making the rounds on Pintrest and facebook (from http://www.beaducation.com/spiro) Clearly these are a steam-punk wrap. I need to work out the bail, but this is an easy wrap, and it captures the cab nicely.


I plan on integrating them into my polymer clay work, but in the mean time I have been playing with settings.
Playing with one of the eyes I made

While playing with epoxy sculpting clay I set some onto some basic findings, rings and one of those pieces with blank spots for you to put in your own gems


At the art store I was looking at some settings. The ceramic one needs to have the background painted in, as its a bit too big and the white shows (but its cute), the colored plastic frames are a bit too small, and the metal finding is great.


This made me think of the frame molds I have, they aren't going to work


And just because these are so cool looking I will leave you with this picture again


Thursday, March 28, 2013

Excited


About a week ago, Fire Mountain Gems sent me the matted image of my medusa necklace. I knew it had placed as a finalist in the metals competition, but this.... this looks like a magazine ad.

Im so excited. I will make sure I share if and when it gets used as an ad.

Wednesday, March 6, 2013

wire wrap treble and bass note cake topper


So I was asked if I could possibly figure out how to make this treble and bass note cake topper. And I said sure, it looks easy enough. I really didn't look at it until I pulled out the wire to make it, then I realized that this original one had to be soldered together. Oops. Well i figured it out with a little bit of extra wire wrapping and ta-dah. I used 16 gauge aluminum wire. Comparing the pictures I wish I had some heavier gauge wire, but hey. It looks good, the bride loves it -and thats what matters.

The top pic is mine, the bottom is the picture she gave me, came from somewhere on pintrest.

Thursday, January 20, 2011

Learning new skills

Hi Im Bob- side view

Copper coil earrings
Originally uploaded by Zoeowyn

I am using my participation in Ring a week (RAW) and Thing a Week (THaW) as a concerted effort to build skills. One of the ways I am doing this is to actually follow some project how-to instructions from magazines. I certainly have enough magazines!

This week I ended up practicing book/magazine instructions for both RAW and THaW

This week's Thing is a pair of coiled earrings using copper wire.
I had intended on making a chain bracelet, but I did not have enough of this spool of wire. I did have enough to finish the spool up and have some earrings.
I made this pair of earrings following directions from:
The Best of Step by Step Wire jewelry 2010. Egyptian Chandeliers by Jeanette Ryan.
After following the directions I modified a tad because the directions in the magazine included crystal drops -I just used swirls, and the way the two middle pieces hung, they fell off and did not lock onto the main ring.
I ended up putting one on facing the other direction. Visually you can't tell a difference, structurally it keeps the dbl spirals hanging and not falling off.

Check out the other amazing jewelry pieces being created for THaW 2011

I need to practice making coils, and my needle nose pliers are crap, they torque out of position with a simple twist, not good, will replace.

This week's RAW was "Hi I'm Bob"
Bob- big obnoxious bling, named so by my daughter after I created my first ring using this rhino head mold. We came up with a bunch of silly ring titles for a series, as if they were 1960's movie title "Bob" "Return of Bob," "Son of Bob" and so forth.
This one is is "Hi, I'm Bob" inspired by the blob-type character Bob from Monsters vs Aliens.
Hes a little too textured to be transparent, but that was the goal.

Wire wrapping techniques from Dale Armstrong's book, I combined the cocktail ring base and prong set the head.

Yes I prong set a resin rhino head!

Check out the other fabulous ring creations at the RAW flickr pool

Thursday, January 6, 2011

Thing a week and practice techniques--all in one

I have joined the flickr THaW jewelry challenge. Inspired by Ring a week- RAW, its a jewelry thing a week. My THaW is going to serve double duty. One of the things I want to try to do is justify my obsessive purchasing of jewelry making magazines. I decided I needed to actually start doing some of the projects in them.

Wire frame bracelet based on Curlicue Cuff by Sally Stevens from BeadUnique fall 2010.

This makes a pretty good frame, and I think I would like to try it with a wire wrapped center piece. A little more planning, and a base ball bat so I have something large enough and round to use as an anvil. (or start off with slightly harder wire).

Lessons learned:
--these projects are always written for a set of specific products, make sure you understand what you are doing before trying to modify it
--even though I managed to bead up the end of a piece of fine silver using the gas burners on the stove, it does not work on 14 gauge copper
--the epoxy/plastic coating most craft wire does not smoke or burst into flames, it just burns in color
--oh yeah I found out the wire I was using was coated
--read all the steps of the article before you begin, this was designed to use 24 inches of wire to make a 6 inch cuff. I have an 8 inch wrist, I didn't get the big groovy curly cues
--adjust sizes accordingly and don't be afraid to cut more wire

Saturday, June 26, 2010

Mixing media


swirlies.jpg
Originally uploaded by Zoeowyn

I saw this beautiful wire wrapped pendent in a magazine.
It was the only project in the magazine, and frankly I didn't think it was work $7.
With much hubris I sketched the swirl patterns from memory at a random later time, knowing that putting this little wire design together would be a no brainer.

--insert ugly buzzer sound indicating I am wrong--

What I had not anticipated was the need for correct assembly order.
That took some time to figure out. I had to wrap, cut apart and rewrap several times before I figured assembly order out.
Next time I am purchasing the magazine.

So I took this spiral design and then began playing with it in polymer clay. My first incarnation was a direct translation as if the clay were wire. Then I began playing with it further.

I tried squaring it off, but the design was less Mayan than I anticipated. Maybe once I go back over it with carving tools, since I plan on having it look like carved turquoise.

Another option, that turned out rather entertaining is the tentacle version. This is another development jump off point.

I find it interesting how design ideas emerge and are influenced by techniques, and influenced by the process; especially if you allow yourself to explore the "hey what if I did it this way next" thoughts you have as you work.

I started playing with this design in clay first. The clay as wire design. Thats when I realized I should take this design evolution thru the proper steps, and make the wire wrap design. After that I felt a better understanding of the design, and assembly issues, and was able to "run with it."

The creative process is like a tree, with the changes branching off as they take shape in my head.

Saturday, July 12, 2008

Things I've learned the hard way


the big diamond
Originally uploaded by Zoeowyn
2 weeks ago I took a wire wrapping with Dale Cougar Armstrong. We made sculpted wrapped pendants. During break I found this great oversized "diamond" and decided that it was perfectly ostentatious and needed to be wrapped in brass --gold would have been, well too costly and frankly just not tacky enough. After all this diamond is a paper weight and over 2 inches in the round.
Well I wrapped it up . It sucked. I went too fast. I need to learn to slow down ad be more controlled and precises with my work. Tihis is an on going lesson I seem to constantly need to learn and re-learn.
So I pulled it apart and rewrapped the loverly stone. I used loads of wire. A also learned do NOT mix your wire wire hardnesses.
This is wrapped using square and round wire. It makes for a visual difference in texture--ok subtle but its there. But the problem in the round wire was deaad soft and the square half hard. Man this was a bit*h to wrap. First of all DAle did warn us against doing this in half hard wire, but then I had to go and mix my hardnesses.
what a control issue that was
not again
or if again I at least KNOW what Im setting my self up for right?

Anothe lesson I learned the hard way was not to cure dimentional objects in my little toaster over, that i used exclusively for polymer clay.
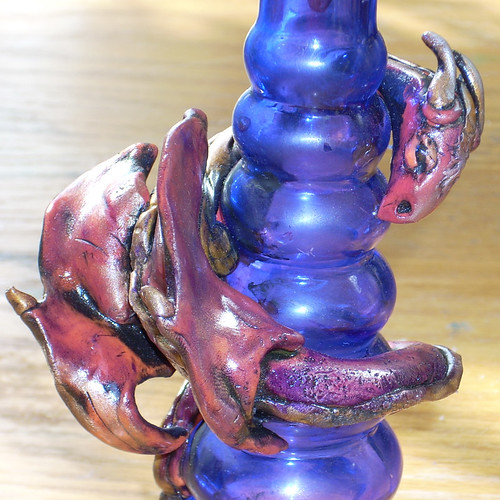
I fired the head off of a dragon box.
Ruined.
Poor beastie, no head.
Fortunately I was able to give him a new head.
Its one of the few dragon boxes i've ever sold.


I also discovered after quite a bit of work on this one bottle, that the cobalt blue glass bottles from Micheals are in fact not blue glass but plastic coated glass. No wonder when i was washing and wiping this dragon down with alchohol the bottle color looked like it was changing. It was! (no more blue bottles for me)

Spider web


spider web 2
Originally uploaded by Zoeowyn
I purchased this awsome ruby glass from an etsy vendor (MoonDancer.etsy.com), not knowing what I was going to do with it, just had to have it. One of the ladies in the wire wrapping class found the spider. Mary, who I sat next to, and I plotted this little masterpiece from there. The egg sac was mary's idea.
I love it its perfectly wicked!

Wednesday, June 25, 2008

Things I like

two fold post
one fold: I reaslized I don't need to blog huge amounts of info when I blog, its ok to just post a quickie


two fold: I really like these little shrines, I find them very inspirational, and I want to make some
this is a Guardian Angel Box by SilverSunbeam


another two fold: Here is another loverly. wire wrapping and peridot colroed pearls, how can it go wrong? This tree is located at starsb117's etsy shop