Pages

Showing posts with label tutorial. Show all posts

Thursday, August 7, 2014

Simple little owl tutorial


This makes a cute little easy owl.

You need:
Clay: 3 colors for the body, white and black or blue for eyes , orange for beak
A roller or pasta machine
Tissue blade
Small cookie cutter: round or oval
Metal head pin to insert to hang


Thursday, January 9, 2014

Origami Boxes


This year in an ornament swap, I received all kinds of goodies, and a hidden "who knew" kind of goodie.
One of the little ornaments came in a hand made origami box.
the box that started it all
This little box started a flurry of  box making obsession at my house. My kids made a ton of boxes for their holiday gift giving, and I am excited, as I will never have to purchase a gift box for my jewelry again.
my kids making boxes

I actually started using the hand made boxes for my Etsy orders, and have received nothing but positive feed back. Its a great way to use all that wonderful scrap-booking paper I don't actually use for scrap-booking.

There are actually lots of how-to origami box instructions out there. Im just adding another one to the mix. Hope its helpful!


Friday, September 27, 2013

Tutorials That Works: Polymer Clay Eyeballs


I decided I needed a good eyeball for a figurine I was making. I wanted it to be a good, glass-like eyeball, really add some pop, especially since the figurine has buggy-out eyes.

I encountered a few variations of this tutorial on Pintrest for how to make glossy doll eyes.


THEY WORK!
These were the tutorials I referenced:
http://mistymooncreations.blogspot.com/2010/10/glass-eyes-for-your-dolls-tutorial.html
http://munchkinscreations.com/Eye1to3.html
http://makeitwithme-kell.blogspot.de/2011/09/how-to-make-fimo-clay-eyes-for-pin-up.html


I made a full eyeball, since they needed to bug out.
I used some texture making tools, a pin and ball burnisher to "draw" the details of the iris in place.

I covered and cured the the balls following manufacturer's instructions. One eye cracked. I remember a few years ago some artists were having this issue– white beads cracking, there was something wonky in the formula. My white clay was from that time, and it was that brand. (my clay is several years old, Im sure this issue has been corrected-cracking upon curing is not normal.) Since the crack was on the back side of the eye, and would be covered with eyelid, I wasn't too worried about it.

I used watered-down acrylic paint to color the irises.

waiting for the liquid clay

After they dried I used some foil to brace the balls from rolling around.

I heeded the warnings about messing up the liquid clay, so I worked in the kitchen right next to my pre-heated oven.
liquid clay in place

right out of the oven, very cloudy
Everything worked just as described. I found that I did have to move my heat gun a bit closer than 3 inches to get the liquid clay to clear up.
had to move the heat gun a bit closer than 3 inches


the irises got all glassy!

And here you can see the eyes in place. 

Wednesday, February 20, 2013

Valentine's Day Crayons


This year we made 36 crayons


The blue and yellowish one with pock marks was my favorite this year


Its always fun too see them melted in the tray because that is never what they end up looking like.

Directions:

You need a heart shaped pan, those silicone ice cube trays are not going to stand up to the heat

And another pan with an edge to catch all the spilled wax from the heart shaped pan, and you will have spilling wax, so a cookie sheet with walls is a must

Skin and break up a whole bunch of crayons (or just use all the crayon bits from the bottom of your crayon bucket--what  do you mean you don't have a crayon bucket?)

The more expensive crayons have more pigment and less wax to them, they melt a little slower but you will have a better crayon in the end. The cheapo crayons work just fine, but you will have a layer of non -crayon wax on the back of your heart crayon.

I use a Wilton heart cookie tray, it takes just about 3 full crayons to make one heart crayon.

Break up your crayons, mix up your colors. We found that you do not need to pulverize your crayons, chucks 1/2 or smaller are just fine.

Place in oven, I use 300 degrees and basically just watch it until they are melted. Carefully remove the two pans (this is when the molten lava crayon wax will spill), let the trays cool. After about 20- 30 minutes I put the crayon tray into to freezer for about 10 minutes, then the crayons pop right out.

Wednesday, February 13, 2013

I <3 Robots


Every year for Valentines day I make my kids a special piece of jewelry. They are still little and I know this will get lost, but in time they may come to value that mom made them something special. Or not.

This year they seem to be full of squees when it comes to cute little square robots.
I was totally inspired by a wire artist I follow on facebook, who had a give away day for her tutorials as a big "Thank you" to all of her followers. So I wanted to give you all a free tutorial. Since I only have two tuts over on clay lessons, I decided to just publish the freebee here.

So happy Valentine's Day if you celebrate it, if not, happy February 14th! heres a little robot tutorial for you!

Supplies/ tools

half block polymer clay
big pinch of pink or red polymer clay for a heart
liquid polymer clay
eye pin (or twist your own with 2" wire)
2 seed beads
1 bugle bead
ball tip burnishing tool, or aluminum knitting needle
oven roaster bag
dedicated pie pan
index card
cookie sheet


Component building

Condition and start forming the pieces of your robot. I hand formed my body parts, you may decide for a more mechanical look to use a tissue blade to cut out your boxes.

All of my sizes are "ish" meaning not exactly

you will need:
3 small balls for "rivets"= 1/8 inch round
1 top knot = 1/8' tall x 3/16 x 3/16
1 head = 3/8" x 3/8" 1/8 thick
1 body = 1/2" x 1/2" 1/4" thick
1 hip box = 1/4" x 1/2" 1/4 thick
2 legs = cubes 1/4" per side
2 feet = balls 1/4" round
2 arms = 1/8"x 3/16" 1/8" thick
2 wrists = medium balls 3/16" round
2 hand pads = rounded triangles about 3/8" long

from the second color of clay a heart a little larger than the hand paddles.

Again the sizes are not exact, and you may find that you like a wider body and no hip box.


Assemble the body


Use a bit of liquid polymer between the pieces to ensure they cure together.

Attach the top knot to the top of the head, then add the head to the body.

At this point add the eye pin: make an indent with your ball burnisher (or knitting needle tip), add some liquid polymer clay into the divot, then shove the eye pin in.


Continue to build the robot body, remember to add a drop of liquid polymer between pieces.


Add the face

Using the ball burnisher or knitting needle make two small divots for the eyes, fill the divots with a small drop of liquid clay, place the seed beads so the hole looks like a pupil. Push the bead into the clay with the burnisher.

For the mouth make three small divots for the bugle bead, repeat the process you did with the eyes: a drop of liquid clay, place the bead, push into the clay.


Assemble the arms

There are two arm styles presented here.

Style A-arm along side the body: add the arms and wrist balls along side the body block.

Style B- arm holding heart: its easier to build the arm, then attach it to the body. Arm block, wrist ball, paddle hand. Make divots in the end of the arms to seat the wrist ball into. Make divots in the wrist ball to seat the paddle hands into. Place the arms so they are rotated away from the side.


Rivets

Cut one of the small balls in half. Place on either side of the head. Using the burnisher tool or knitting needle push little divots in the middle of the ball.

Place the remaining balls at the top of the arms (where the shoulder would rotate).  Using the burnisher tool or knitting needle push little divots in the middle of the ball.


Hearts

Style A has the heart placed in the middle of the body box, use liquid clay to help it to stick.

Style B holding the heart-- now this can get tricky-- to help support the hands hold the heart, roll up a small bit of paper towel and place it on the body block. Then gently rotate the wrist balls and paddle hands in towards each other, and place the heart between the paddles. Don't use too much liquid clay here or the heart will slip out of the hands, you need just enough for the heart to stick to the hands.


Cure it

Place your robot on an index card on your dedicated pie pan. Place the pie pan in the oven roaster bag, close the roaster bag with a twist tie. Place this on the cookie sheet and cure following your clay brand instructions.

Let the robots cool completely before taking them out of the pan, the arms on robot B need to be fully cured and cooled before touching them or they may fall apart.

Wednesday, January 16, 2013

Blogging for other people


I've started off this year with a short series of Getting Started with Polymer Clay posts over at Artisan Whimsey.

This week's installment includes three simple tutorials in "playing" with clay


Monday, March 29, 2010

ooh look! A chicken.


I have self published a tutorial for shaker chickens!
The tutorial is available at Claylessons.com

This isnt my first tutorial, I have actually posted some project tutorials here on this blog, but it is my first attempt to sell one!

weeee!

This is a project I submitted to Polymer Cafe and never heard back from them, so pppththth to them.
Of course I would like to be magazine published with a tutorial at some point, and I am working towards that goal.
So ta-da!

just in time to make use of all those plastic Easter eggs!

Sunday, May 3, 2009

Color theory with mica pigment powders

Color theory is the study of mixing color and the visual impact of certain color combinations. There are many aspects to be taken into consideration when studying color. The form of the color —opaque pigment, translucent inks, transparent light—impact how colors interact and mix.

Mica pigment powders are ground natural mineral (mica) flakes coated with and oxide, usually titanium or iron. The granules of the flakes are solid and reflect light; therefore they are discussed in terms of opaque pigments.


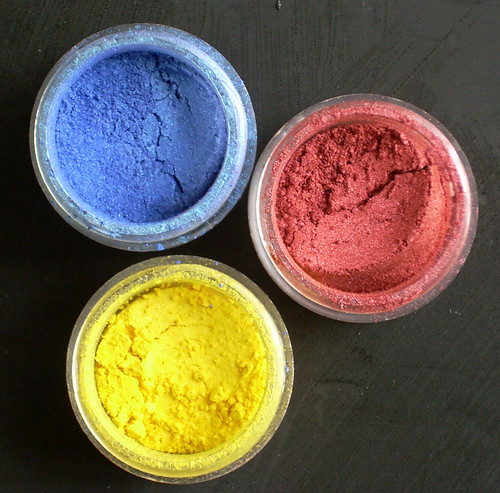
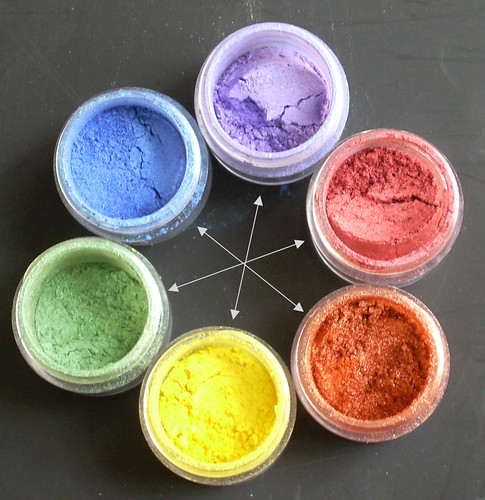
There are three primary colors when dealing with opaque pigments: red, yellow, and blue. These are base, or pure colors. These colors, or hues, cannot be achieved through mixing.


Hue is the name of a color (red, purple). It's easy to remember: Hue and Hugh are both names. Hue is a color’s name, just as Hugh is a man’s name.


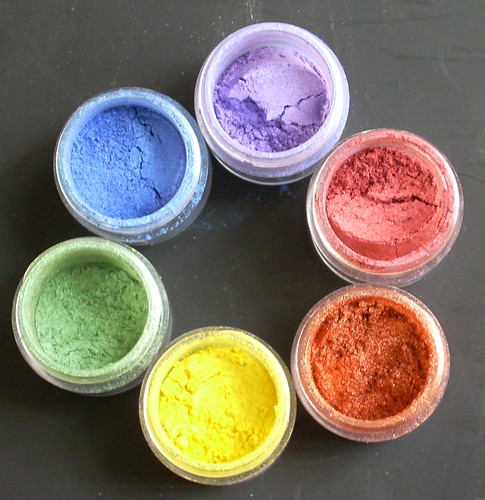
The three primary hues are the basis of the color wheel. Think of a rainbow in a circle, showing the range of hues that can be created when the primary colors are mixed. A basic color wheel shows primary and secondary hues. Secondary colors are achieved by mixing two primary colors.


Yellow+ red= orange
Red+ blue=violet
Blue+yellow=green


Tertiary, or intermediate, hues are the next level of color blends.


Green+blue=aquamarine


Analogous colors are hues that are next to each other along one side of the color wheel. Think of the colors as being in “rainbow order.”


Complementary colors are in opposite positions on a color wheel.


Blue-orange

Yellow-violet

Red-green


Split complementary hues are colors that are in opposite position on a color wheel, with one of the colors of the pair, shifted to the left or right


Aquamarine-orange

Indigo-yellow


Tints and shades are achieved by mixing a pure hue with white or black. Tints are lighter, and shades are darker. Tints can be achieved with mica pigments on clay by varying the quantity used. Both tints and shades can be achieved through blending pigments together.

There are many ways to help with the selection of color combinations. Magazines frequently will publish color pallets (a selection of hues) that they predict will be the season's popular colors, or are currently the popular colors. Keeping notes in your sketch book of color combinations you have seen and like, will help on future projects. Color choice is always going to be subjective, simply because different people favor certain hues over others.

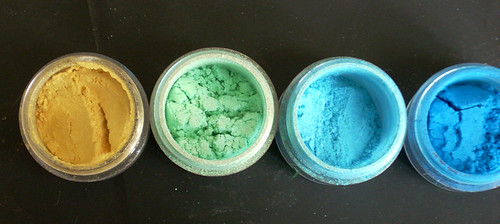
Analogous colors are always pleasing combinations. An analogous range can be created with a “jump” or skip over a single color in the range.

To “jazz-up” a selection of analogous hues, add an accent color – such as in the example:

Yellow-aquamarine-blue (green was skipped)


Accent colors work well when they add contrast. A good way to achieve this is to select a complementary color.

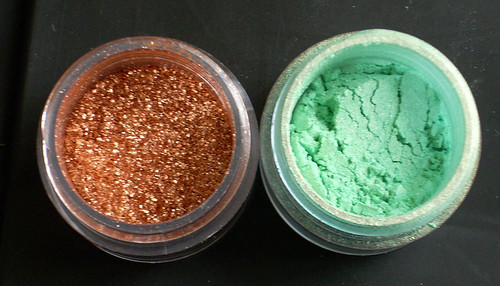
Pure complementary colors can be a bit jarring—think of bright red and green together. A modified complementary combination can be quite pleasing. Using a combination of split complementary with tints of the hues create very successful combinations. Copper and turquoise are a good example of this: copper represents the orange hue and turquoise is a tint of the aquamarine hue.


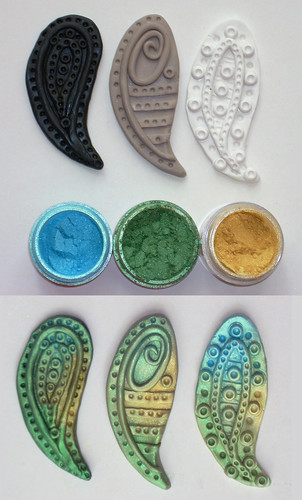
When planning on using mica pigments, the clay body color needs to be taken into consideration. The hue of the clay body will impact the tint and intensity of the applied mica pigments. Colors will not appear as bright on white as they will on black. Using a neutral base will give a more subtle effect.


When using colored clay make pigment selections based on analogous hues. Using complementary hued pigments on colored clay will dull down the overall appearance. Interference, or color shift, pigments incorporate a bright accent hue- so the pigment seems to shimmer in a different color. Frequently the shift is to a complementary hue, or using a bright color on a colorless base. These are great for adding “jazz.” You need to pay attention to the shift color when using interference pigments. You don’t want to lose an exciting color shift by applying the pigment to a base clay the same color as the interference shift. Applying a color-less interference powder with a complementary color to a colored clay base will not dull the overall appearance but add the “oohhh aahh" effect.

Pigments can be blended to achieve almost any hue on the color wheel. Warning: when blending colors limit how many you use. Too many colors mixed together tend to end in a muddy color. Blending of complementary colors will also result in a mud color. Mica pigments are available commercially for the arts and crafts industry. Mica pigments make-up is also available, and can be used on polymer clay. Expanding into the world of powder and pressed powder eye shadow expands the range of hues and tints available. There are so many hues available it's almost not necessary to every need to blend pigments.

Always use mica powders safely. Use in a well ventilated area, and protect your lungs by wearing a face mask. Mica pigments are made from minerals and oxides, not something you want to inhale.