Pages

Showing posts with label art making. Show all posts

Saturday, January 21, 2012

Making stuff


Squirrel!
Originally uploaded by Zoeowyn
I've been making stuff, art stuff, jewelry stuff, clay stuff. Im really enjoying the process.

I know quite a few polymer artists work in the same processes, but I thought I might share anyway.

I love the bright colors of clay, and they mix all together and make other colors

Sometimes I leave the colors alone, like I did with these cute little squirrel and acorn charms

I really do fall in love with the colors. Sometimes I have a hard time determining if I should keep the straight colors or if I should take them to the next level.


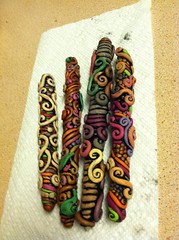
polymer pens out of the oven
Originally uploaded by Zoeowyn
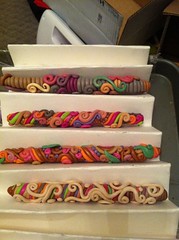
These pens were just yummy combinations of color when they came out of the oven. One of the things that was so fun about these, they all worked out so well, and they were all made from my scrap cup collections. I have a few yogurt cups that I toss small left over bits of clay into. Sometimes I blend those scraps together to make other colors, sometimes they are just that blended bits. The pens are sitting in an accordion of folded paper board I use to support them while curing in the oven.

Well after staring at the pens for a few days I decided they needed to go to the next level. Im always a little nervous taking my work here. Especially if I fall in love with it in straight colors. Once of the reasons I think its nerve inducing is I take those wonderful colors and completely cover them in paint. I use acrylic paint. Sometimes I use black, like I did here, and sometimes I use brown or purple, or rust. Ive even tried white, but those never seem to work the way i think they should. SO I cover them completely before I go back and wipe off the exces paint. I really only want it in the crevices. I use a combination of paper towels and magic erasers to do the job.
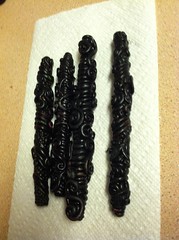
They really start to begin to almost glow after cleaning the pain toff. The colors are framed and begin to pop! If I want brighter colors I will scrub over them again with the magic eraser some more.


After the paint dries I buff the work over with gilders paste. Sometimes I use more than one color. There used to be only a few metallic colors available at the craft stores, but now there are a wide selection of colors available online. So these final pens have been buffed up with the metallic paste and coated in polyurethane to seal it all in.
And once this entire process has been done Im always glad I did it.

Thursday, April 22, 2010

The Hat


I have been mildly obsessed with the Mad Hatter's hat from Tim Burton's Alice in Wonderland. Im not exactly certain why. I have also been fascinated with the mini victorian style top hats, and how they really work in Steampunk fashion.

So where did it all start? Well I am a fan of Tim Burton's movies. Simple, easy, to the point. I admire Johnny Depp as an actor, no he's not hard to look at but I actually do not have a movie star crush on him.
And well, I believe Tim owes me some royalty fees for using my hair. Oh yeah, thats my hair alright, down to the color.

And well if its my hair, then its a natural to think I should be that Mad Hatter for some costuming event (no I don't have a specific event). But Im not a boy, and I don't want to dress as a boy; no I want to do a girlie version. So naturally the feminine mini hat seemed like a "oh why not." Gives me something else to try to make.

I am soooo not a hat maker, I have tried, and I understand why they cost what they cost. But I still wanted to make that hat. Out of clay! So I have been working out in my head for just over a month how to construct a hat in polymer clay. I have 3 designs I want to try out. Will I make more after that? Don't really know, lets see how these 3 go first.

I finally was able to spend some quality time working on the hat. I made my pattern, modified it a bit and remade the pattern. Then I cut the pattern out of screen door mesh. Then I cut it out of clay. The assembly required some curing of bits before assembly, and super glue to help. Along with some strategically placed wads of paper for curing support.

So far I have 5 curing rounds, I have a few tweaks to do so there is at least one more cure. The hat as pictured is not quite finished, there are some details that need to be finished, like the hat pins across the front, and the tag needs the 10/6 written on it. its "lined" in orange, because I wasn't sure I was going to actually do this hat at the time, but I like it. I'm pleased with how it has turned out. I will finish it up in the next day or two, and do a trial run on actually wearing it; its heavier than I had originally thought it would be, so I am thinking I should try out the featherlight sculpy product--that stays light even after curing--for some base construction.

The pictures: in progress, you can see the mesh; assorted views

Tuesday, January 5, 2010

Starting of the year right!


Thought for the New Year ... if you are not living your passion ... Use the Blue Moon energy to help you with a new beginning.... "Find your passion. Look into the volcano-the fire, the lava of your Soul. The part that burns insistently and urges you to look at it. It is there that you find your answers and your true joy."

I can hardly believe I haven't had any artistic worthy posts since September--ouch.
Well I am starting off 2010 with the mojo focused in the right direction. I began this year prototyping!
Back in May I had these Easter egg ornaments and had no idea what to do with them. Stumble and trip and I ended up turning them into acorns.
Of course I thought these were the bees knees as it were. I ended up converting all of my glass egg shaped ornaments into acorns. I then took a back of styrofoam Easter egg shapes and turned all of them into  acorns. My colors began to deviate from "natural" acorn colors into fun fantasy colors, purples and pinks.


During the curing process I discovered that the styrofoam shrank. And caused the acorns with this as a base to crack. Hubby too k a purple cracked acorn and began to play with it, mostly trying to get the styrofoam out at first, then he thought this would make a great fairy house.
I have mentally been trying to figure out a good acorn base to make houses. You see the styrofoam really wasn't a smart thing to cook in the oven, and I only learned about that after the fact. That and I didn't want to constantly have to fix cracked acorns, because I used the wrong materials.


The first acorn fairy house, 
this one had the styrofoam base.


I thought about using that potato starch packing material, after all its potato starch it should be ok to cook, and it dissolves. 
I tried to mold and egg shape by hand. Ok that was a mess. Then I tried to use a plastic easter egg as a mold. It took a lot more of the packing material than I thought it would, it was very dense and heavy. And it did not keep its shape. In the end it required too much polymer clay, and the acorn turned out distorted and too heavy. And yes it does dissolve, but not before creating a gooey mess.

potato starch base acorn


Then I thought well, if I can used the plastic egg as a mold why not use the plastic egg as base. After all I use it as the base for other projects. So I tried that. and it worked beautifully. It actually cut easier that the thick wall of polymer I had created for the the potato starch based acorn.

The next step is to develop a tutorial for the fairy houses. I have worked one up for the plain acorn. Debating if I should submit it to Polymer Cafe, or go direct to online tutorial down load with claylessons.com.